Growing a crop is not complicated once you understand the basic loop: give a plant light, water, nutrients, and a stable environment, and it will do most of the work for you. This approach is also the core idea behind how to grow almost anything. Whether you're working with a backyard bed, a container on a balcony, a hydroponic system under grow lights, or even a sealed terrarium, the core steps are the same. Whether you're working with a backyard bed, a container on a balcony, a hydroponic system under grow lights, or even a sealed terrarium, the core steps are the same. This guide walks you through every one of them, from choosing what to grow all the way to storing your harvest, with real fixes for the problems that trip most people up.
How to Grow Crops Step by Step in Any Setup
Marcus Holloway
24 Mar 2026
How crops actually grow (the short biology lesson)
Before you plant anything, it helps to know what a plant is actually doing, because once you understand it, every care decision starts to make sense. A crop plant goes through four main stages: germination, vegetative growth, flowering/fruiting (or heading, for crops like lettuce), and maturity. Each stage has different needs, and skipping ahead or neglecting one will cause problems in the next.
Germination is just a seed waking up. It needs moisture, warmth, and oxygen to crack open and send out a root and a shoot. It does not need light yet. Once that seedling breaks the surface, light becomes the engine. Through photosynthesis, the plant converts light into sugar, which fuels every other process. Water carries nutrients up from the roots and keeps cells rigid (which is why wilting is a hydration problem). Nutrients, especially nitrogen, phosphorus, and potassium, are the building blocks for leaves, roots, and fruit. Temperature controls how fast all of this happens, and if it goes too far in either direction, growth slows or stops entirely.
The growing medium, whether that's soil, water, or a soilless mix, is simply the delivery system for water and nutrients to the roots. Understanding that one fact makes it much easier to switch between growing methods without getting lost.
Picking the right crop and planning your setup

The single biggest mistake beginners make is picking a crop that doesn't match their environment. A full-sun tomato plant in a north-facing apartment window is going to fail no matter how carefully you water it. Start by being honest about what you're working with, so you can choose an approach that fits your space and learn the basics of how to grow food plants. how to grow food plants
Match the crop to your conditions
- Outdoor growers: check your USDA Plant Hardiness Zone (you can look it up by ZIP code on the USDA Plant Hardiness Zone Map) and know your average last frost date. Warm-season crops like tomatoes, peppers, cucumbers, and squash can't go out until after frost danger has passed. Cool-season crops like lettuce, spinach, kale, and peas thrive in spring and fall and can handle light frost.
- Indoor and container growers: measure your light first. Most food crops need at least 6 hours of direct sun or a grow light rated for at least 2,000–3,000 lux at canopy level. Leafy greens are the most forgiving; fruiting crops need more.
- Hydroponic growers: you control almost everything, which is an advantage, but you also have to monitor everything. Start with fast-growing crops like lettuce, basil, or spinach before moving to tomatoes or peppers.
- Terrarium growers: this method suits herbs and microgreens well, or tropical plants with high humidity needs. Standard food crops like tomatoes are generally too large for enclosed terrariums.
Plan before you plant
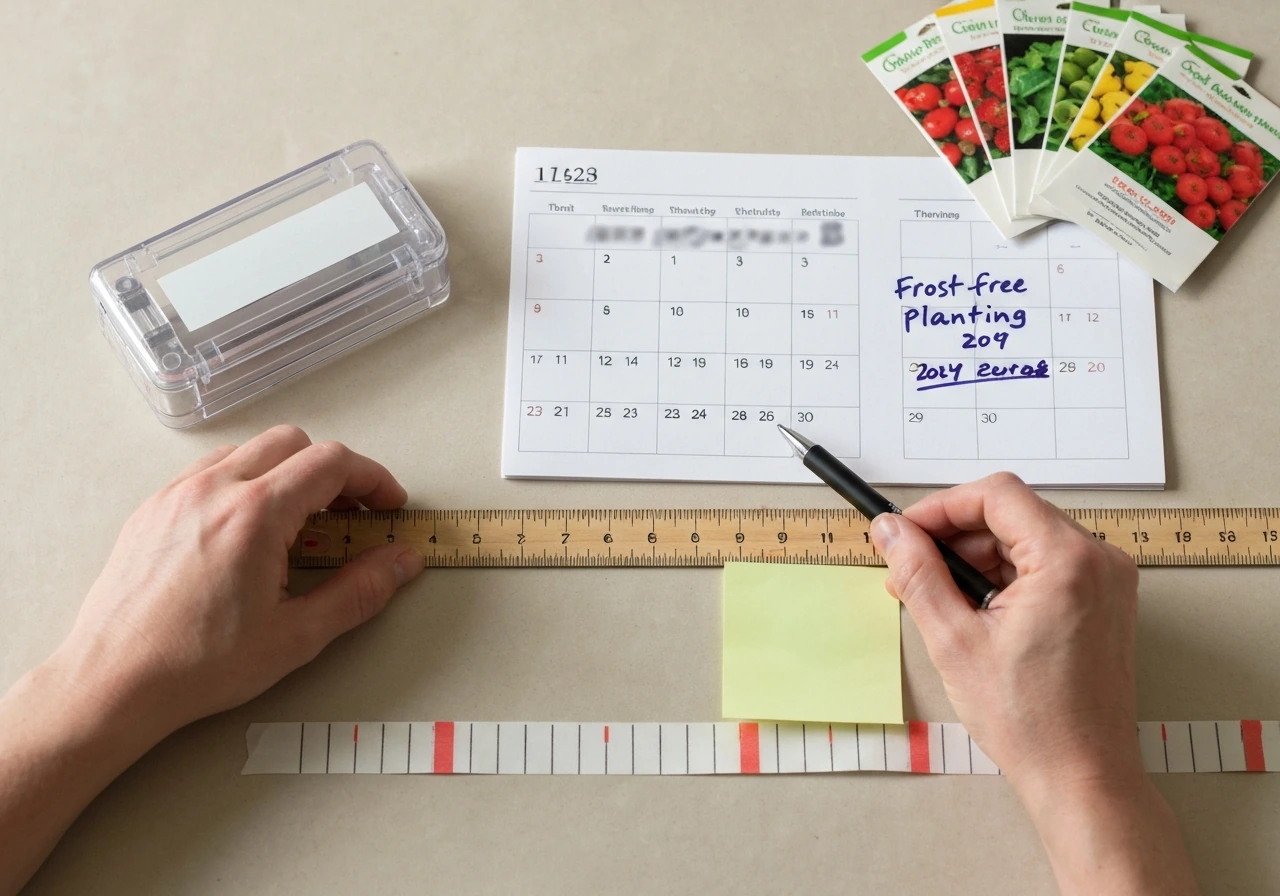
Work backwards from your frost-free window. If you're growing a warm-season crop that takes 70 days to mature, count 70 days forward from your last frost date, then add a week or two buffer. Planting schedules can shift by about two weeks in any given year depending on actual weather, so building in that buffer protects you. For fall harvests, count backward from your first expected fall frost, using the crop's days-to-maturity as your guide.
Step-by-step: from seed to harvest
This workflow applies whether you're [growing in soil, containers, or a hydroponic system](/planting-steps/how-to-grow-plants-and-flowers). The medium-specific differences are covered in the next section, but the sequence is the same. The medium-specific differences are covered in the next section, but the sequence is the same.
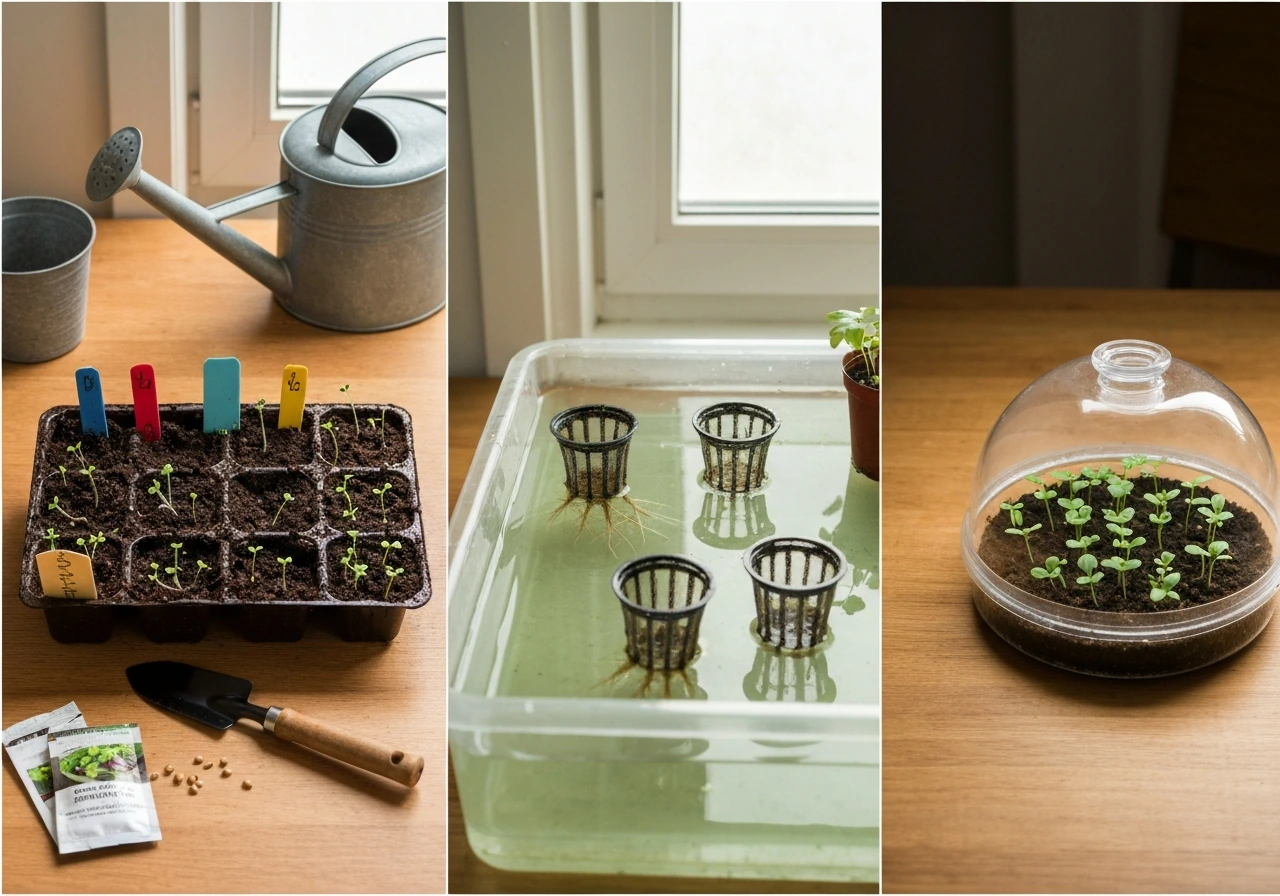
- Prepare your growing medium. For soil beds, clear weeds and loosen the top 8–12 inches. For containers, fill with fresh potting mix (not garden soil, which compacts in pots). For hydroponic systems, mix your nutrient solution and check pH before adding plants or seeds.
- Decide: start from seed or transplant? Seeds are cheaper and give you more variety options. Transplants save 4–8 weeks and are better for short growing seasons or slow-maturing crops like peppers and tomatoes. For fast crops like lettuce, radishes, beans, and carrots, direct seeding is usually the better choice.
- Sow seeds at the right depth. A general rule is to plant a seed about twice as deep as it is wide. Planting too deep stresses seedlings and delays emergence, which increases their exposure to soil-borne pathogens. Follow the packet's depth recommendation.
- Keep the germination environment right. Seeds need consistent moisture (moist, not soggy) and warmth. Most vegetable seeds germinate fastest between 65°F and 75°F. Don't add fertilizer yet; seedlings don't need it and excess nitrogen makes them tender and more prone to damping-off.
- Provide light as soon as seedlings emerge. Outdoors, move them to their permanent spot or harden off transplants over 7–10 days by gradually increasing outdoor exposure. Indoors, put lights on a timer for 14–16 hours per day for most crops.
- Thin seedlings to proper spacing. This is painful but necessary. Overcrowding causes competition for light and nutrients, poor airflow, and disease. Thin by snipping (not pulling) extras at soil level so you don't disturb roots.
- Water consistently. Most crops prefer deep, infrequent watering over frequent shallow watering. Water when the top inch of soil feels dry, and water until it drains from the bottom of the container. For garden beds, 1 inch of water per week is a standard starting point.
- Feed at the right time. Start fertilizing about 2–3 weeks after transplanting or once seedlings have their first set of true leaves. For fruiting crops like tomatoes and peppers, side-dress with additional nitrogen after key growth milestones, for example when peppers set their first fruit at about the size of a quarter.
- Monitor and adjust as plants grow. Check for pests, signs of nutrient deficiency, and environmental stress weekly. Catch problems early and they're almost always fixable.
- Harvest at peak ripeness. Use crop-specific cues: pickling cucumbers at 2–4 inches long, leafy greens before they bolt, tomatoes when fully colored and slightly soft to the touch. Delaying harvest past peak drops quality fast, especially for leafy greens which turn bitter and tough.
Soil vs. hydroponics vs. water vs. terrariums: picking your medium
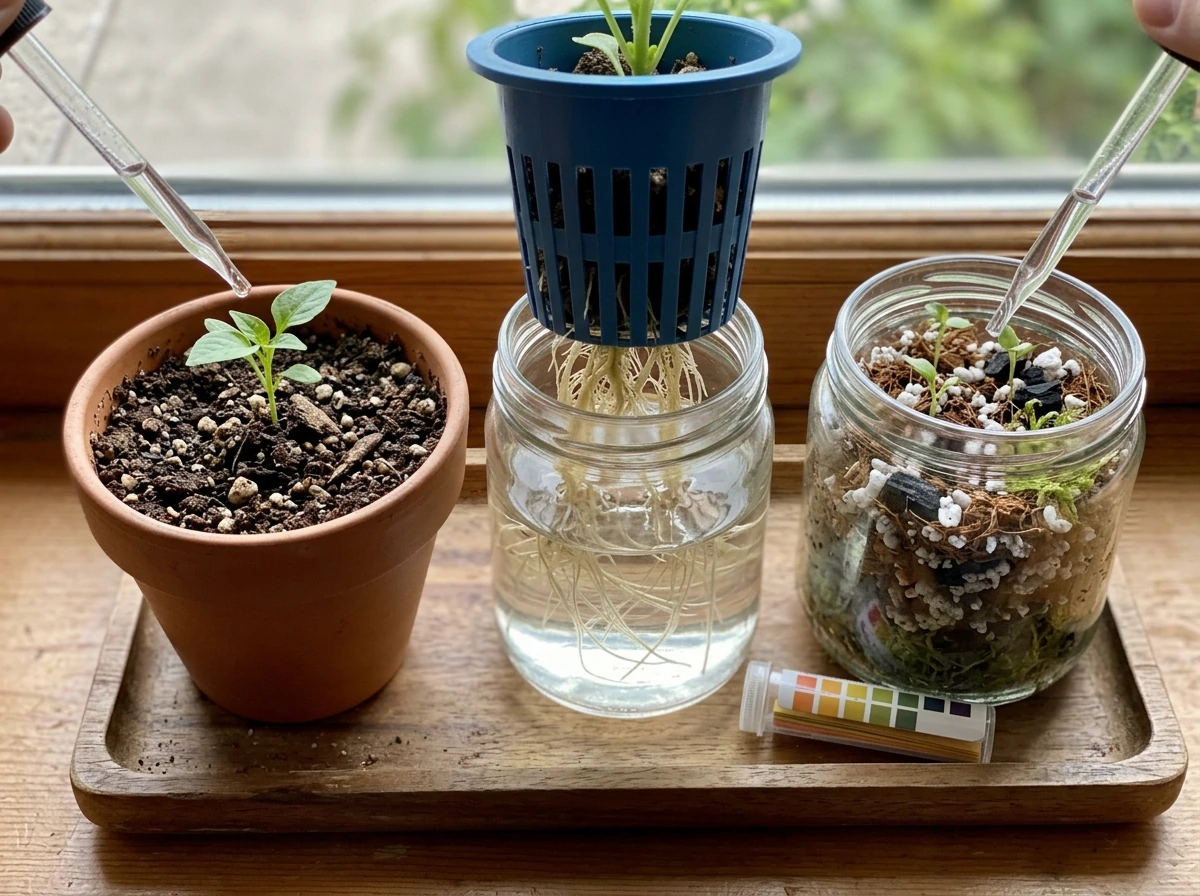
growing medium has real trade-offs. Here's a direct comparison to help you choose, followed by a short recommendation. how do crops grow
| Growing Medium | Best For | Key Advantage | Main Challenge | pH Target |
|---|---|---|---|---|
| Soil (in-ground bed) | Outdoor crops, large-scale growing | Natural buffering, microbial life, low cost | Weeds, soil quality variation, drainage issues | 6.0–7.5 for most crops |
| Potting mix (containers) | Balconies, patios, beginners | Portable, good drainage control, easy to manage | Dries out faster, needs regular feeding | 6.0–7.0 |
| Hydroponics | Indoor growers, fast production, year-round | Fastest growth, precise nutrient control, no weeds | Requires pH/EC monitoring, equipment cost | 5.5–6.5 |
| Water culture (kratky/DWC) | Leafy greens, herbs, beginners to hydroponics | Simple, low-tech, low cost | Root rot risk if oxygen is low | 5.5–6.5 |
| Terrarium/closed system | Herbs, microgreens, tropical plants | Self-watering cycle, high humidity crops | Limited crop size, not for most fruiting crops | Varies by crop; match to potting mix used |
If you're a beginner growing food for the first time, start with soil or a quality potting mix in containers. It's the most forgiving system because the soil buffers pH swings and holds onto nutrients between watering sessions. Move to hydroponics once you're comfortable with the basics of plant care, because hydroponics rewards growers who already understand what healthy plants look like. For hydroponic systems specifically, keep your nutrient solution pH between 5.5 and 6.5, and monitor electrical conductivity (EC) regularly since both pH and EC drift over time as plants feed and water evaporates.
Common problems and how to fix them
Most crop failures trace back to a handful of root causes. Here's how to diagnose and fix the ones you're most likely to run into.
Seedlings dying right after germination (damping-off)
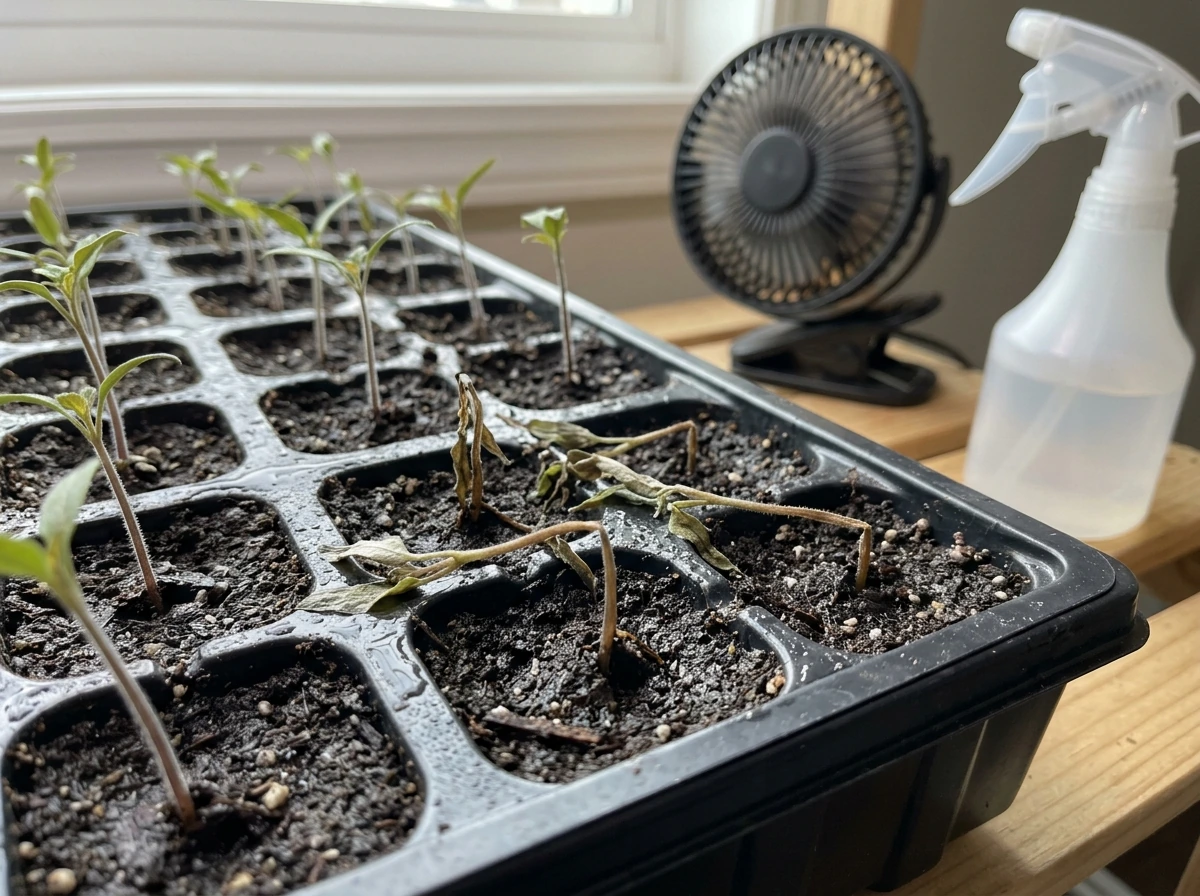
Damping-off is a fungal problem that makes seedlings collapse at the soil line, and it's almost always caused by conditions that are too cool and too wet. The fix is simple: water less, improve airflow, and don't plant seeds too deep. Use clean pots and fresh potting mix, not reused garden soil. Keep the mix moist but never soggy, and avoid overfertilizing with nitrogen, which makes seedlings soft and vulnerable. If you've lost seedlings to this before, it's not bad luck; it's almost always a watering issue.
Yellow leaves and poor growth (nutrient problems)
Yellow leaves are the most common distress signal and the most commonly misdiagnosed. Nitrogen deficiency shows up as yellowing that starts from the oldest (lowest) leaves and works up. Too much water causes similar symptoms because waterlogged roots can't absorb nutrients even when they're present. Before adding fertilizer, check that your soil or solution pH is in range, since pH outside of 6.0–7.5 for soil or 5.5–6.5 for hydroponics locks out nutrients at the root level no matter how much you feed. If pH is fine and you're in a container that hasn't been fertilized in over three weeks, a balanced liquid fertilizer is usually the right next step.
Pests: aphids, fungus gnats, and caterpillars
Aphids cluster on new growth and under leaves. For light infestations, a strong blast of water knocks them off. For heavier infestations, insecticidal soap or neem oil works well, but you'll need to reapply because it only kills aphids on contact at the time of spraying. Fungus gnats are the tiny flies hovering around your soil; the adults are annoying but the larvae damage roots. Let the soil surface dry out between waterings (bottom-watering helps with this), use yellow sticky traps to catch adults, and apply BTI (Bacillus thuringiensis israelensis) to kill larvae in the soil. For caterpillars like tomato hornworms, hand-pick large ones and treat young caterpillars with Bt or spinosad, both of which are low-risk options that target caterpillars specifically without harming most beneficial insects.
Fungal diseases: powdery mildew and leaf spot
Powdery mildew shows up as a white or gray dusty coating on leaves, and it actually doesn't need wet conditions to take hold. It's most common in warm, dry weather with poor airflow. Prevention is the best control: space plants properly, avoid overhead watering in the evening, and choose resistant varieties when possible. For Septoria leaf spot on tomatoes (small brown spots with lighter centers), remove infected leaves as soon as you see them, clean up plant debris at season's end, and apply a fungicide early if symptoms are spreading. Catching both diseases in the first week makes a huge difference in how far they spread.
Watering mistakes (both too much and too little)
Overwatering is the number one killer of potted crops. The symptoms look almost identical to underwatering: drooping, yellowing, slow growth. The difference is that overwatered soil feels wet or cool an inch below the surface, while underwatered soil feels dry and pulls away from the pot edges. Always check before you water, and make sure your containers have drainage holes. For garden beds, use the finger test or a simple moisture meter. If your schedule means you travel or forget to water, drip irrigation or self-watering containers are genuinely worth the investment.
Timing, care schedule, and harvesting your crop
A simple weekly care rhythm
- Every 1–2 days: check soil moisture and water if needed. In hot or windy weather, containers may need daily watering.
- Weekly: inspect leaves top and bottom for pests or disease. Check for yellowing, wilting, or unusual spots. For hydroponic systems, check and adjust pH and EC.
- Every 2–3 weeks: fertilize with a balanced liquid fertilizer for most crops. Switch to a lower-nitrogen, higher-phosphorus feed once fruiting crops begin to flower.
- As needed: side-dress long-season crops like tomatoes, peppers, and corn with additional nitrogen at key growth stages. Remove dead leaves, spent flowers, and any diseased plant material promptly.
- Seasonally: plan your succession planting so you're always starting new seeds as older crops are harvested.
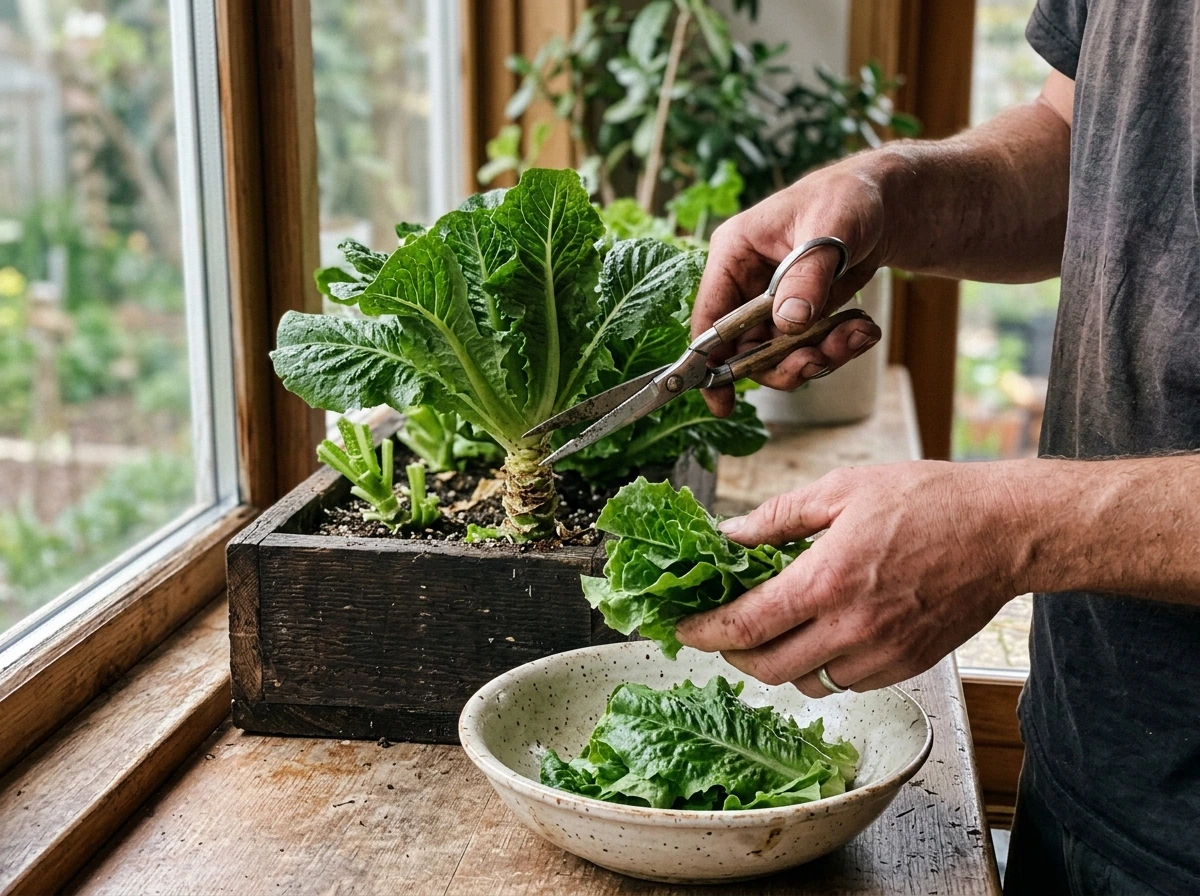
Knowing when and how to harvest
Harvest timing is crop-specific, and getting it right makes a bigger difference than most people expect. Leafy greens like lettuce and spinach should be harvested before the plant starts to bolt (send up a flower stalk), because once they bolt, flavor turns bitter fast. For cucumbers, harvest when fruits are at the size listed on your seed packet, for pickling types that's usually 2–4 inches long. Tomatoes are ready when they've reached their full color and give slightly when gently squeezed. Regular harvesting of beans, cucumbers, and peppers actually encourages the plant to keep producing, so don't hold off waiting for the perfect moment.
Storing what you grow
Storage needs vary widely by crop, so matching the method to the vegetable matters. Cucumbers, peppers, and tomatoes prefer cool (around 55°F) and moist conditions, not the coldest part of your fridge. Tomatoes actually lose flavor and texture when stored below 55°F, so countertop storage at room temperature is better for short periods. Leafy greens last longest when stored in a sealed container with a slightly damp paper towel in the refrigerator. Root vegetables like carrots and beets keep well in the crisper drawer. Harvest in the morning when possible, since plants are most hydrated then, and process or store the same day for best quality.
Growing crops, at any scale or in any medium, gets easier the more you pay attention to the feedback your plants give you. Yellowing leaves, wilting, stunted growth, these are all signals you can learn to read. Every failed crop teaches you something that makes the next one better. Start simple, stay consistent, and adjust as you go. That's genuinely all there is to it.
FAQ
Can I grow crops indoors year-round, or do they need outdoor seasons?
Yes, but you need a consistent day length and intensity. If you’re using grow lights, aim for a predictable schedule (for many crops, 12 to 16 hours on is a common starting point), and keep lights close enough to prevent stretching but far enough to avoid heat stress. Also, once flowering starts, don’t keep changing your light timing week to week, because it can delay fruiting.
Should I start from seed in the same container, or transplant seedlings later?
Not necessarily. For containers, you can start seeds directly if the seed packet allows it, but many crops do better with a short seedling phase first. Transplanting works especially well for tomatoes, peppers, and brassicas, because you can harden off seedlings gradually before committing them to their final pot size.
How do I know when to water if a simple schedule keeps failing?
Measure water habits, not just the calendar. In containers, the same watering interval can be wrong from week to week because temperature and plant size change how fast pots dry. A practical approach is to check the top inch daily by feel, then water thoroughly until it drains and empty the saucer so roots don’t sit in runoff.
What’s the best way to adjust nutrients without overcorrecting in hydroponics?
Use pH and EC checks for guidance, but don’t treat them as targets you can set and forget. In hydroponics, pH can swing after feeding, and EC will climb or drop as water evaporates and plants consume nutrients. If you see repeated yellowing or slow growth, confirm both pH and EC, then review water top-ups, system temperature, and root health before adjusting fertilizer aggressively.
How can I prevent lettuce and spinach from bolting when temperatures rise?
For most leafy greens, warmer weather pushes them toward bolting and bitter flavor. If you want reliable harvests, you can plan for “cool-season windows,” start earlier than you think, or use shade during the hottest part of the day. Lettuce in particular often does better when mornings get full sun and afternoons are protected.
Can I grow large crops like tomatoes in small pots, or do I need bigger containers?
Yes, but the main limitation is root zone size and drainage. Many small-fruited crops (like bush beans and some herbs) do well in moderate containers, while heavy feeders (like large tomatoes) need a bigger pot than most beginners choose. If a crop keeps stalling, the container may be too small to hold water and nutrients between feedings.
Is it okay to reuse potting mix for the next planting?
Not reusing garden soil is about more than fertility, it’s about disease and pests. Reused soil can carry damping-off pathogens, fungal spores, and larvae that cause recurring problems in the same area. If you must reuse mix, sterilize properly or at least replace with fresh potting mix for seedlings and container crops.
How do I pollinate crops indoors when there are no bees?
Pollination requirements depend on the crop. Some vegetables can fruit without insects if flowers are managed (like gently shaking plants outdoors), while others need pollinator activity to set well. If you’re growing indoors, you may need to hand-pollinate at flowering time or use a small fan to improve airflow and help pollen move.
How do I fertilize correctly across all growth stages?
Feeding is stage dependent, not a one-time decision. Too much nitrogen late in growth can lead to lots of leaves and fewer fruits, and it can also increase susceptibility to some issues. A safe rule is to start with a balanced approach, then shift emphasis once you see flowering or heading begin.
What should I do when a cold snap threatens my crop?
If temperatures dip, warm-season crops slow down or stall, and fruiting can stop until conditions improve. In cool snaps, add temporary protection like row cover or cloches, and avoid heavy watering right before a cold night because wet soil can chill roots. For frost risk, treat your frost dates as a planning tool, then cover or relocate plants when forecasts turn.
What’s the best way to tell harvest timing if my crop looks “almost ready” but not exactly right?
Watch the plant first, then refine timing. Even if the seed packet says “harvest at X,” big deviations in temperature and variety can shift size and flavor. For cucumbers and beans, pick frequently to keep production going, and for tomatoes, prioritize full color and gentle give over chasing a perfect firmness.
How can I store leafy greens so they don’t go limp or rot?
Yes, especially for leafy greens. If you store lettuce dry, it wilts faster, and if you store it wet, it can rot sooner. The helpful middle ground is a sealed container with airflow management, like slightly damp paper towel contact, and checking every couple of days to remove any compromised leaves.