You can grow almost anything if you match the plant to your conditions and give it the four things it actually needs: light, water, a growing medium, and nutrients. That's the whole game. Everything else, the fancy pots, the premium seed starting mix, the grow light with seventeen settings, is just refinement. If you've killed plants before, it's almost certainly because one of those four things was off. This guide is going to walk you through all of it so you can start today with what you have, choose something that'll actually succeed in your space, and know exactly what to do when things go sideways.
How to Grow Anything: A Step-by-Step Beginner Guide
Marcus Holloway
24 Mar 2026
Start with the right setup for your space and goals
Before you buy a single seed or plant, spend five minutes honestly assessing your space. This one step saves most beginners from their biggest early frustrations. Ask yourself: How much natural light does the room or outdoor area actually get? Do you have room for containers, raised beds, or just a windowsill? How much time are you realistically willing to spend on watering and maintenance each week? Are you growing for food, for aesthetics, or just to see if you can keep something alive?
If you're indoors, stand in the spot where you want to grow and look at the light at different times of day. A south-facing window in the northern hemisphere gets the most light and is suitable for most herbs, succulents, and many food plants. East- and west-facing windows get moderate light, which works well for a broad range of houseplants. North-facing windows are genuinely low-light, and that's okay, but you need to pick plants that are built for it. Matching your plant to your existing light conditions, rather than forcing a sun-lover into a dim corner, is the single most practical advice from experienced growers and extension services alike.
If you're outdoors, note how many hours of direct sun your space gets daily. Most edible plants (vegetables, herbs, fruit) need at least 6 hours. Shade-tolerant ornamentals and some leafy greens can get by with 3 to 4. Check your hardiness zone if you're planting perennials or anything that needs to survive winter. And if you're working with a small balcony, a patio, or just a fire escape, containers are your best friend, and they open up more options than most people realize.
Set a realistic goal for your first grow. If you want food, start with one or two herbs like basil or chives. If you want low-maintenance beauty, a pothos or snake plant is nearly impossible to kill. If you're curious about a specific method, like hydroponics or a terrarium, pick that as your focus and commit to learning that system first. Narrowing your scope at the start means you'll actually succeed instead of spreading yourself thin and ending up with a bunch of struggling plants.
Plant basics: light, water, soil or other medium, and nutrients
Think of these four as the legs of a table. If one is off, everything wobbles. Here's how to get each one right.
Light
Plants use light to make food through photosynthesis, so the amount and duration of light they receive directly controls how fast and how well they grow. For indoor seedlings, aim for 16 to 18 hours of light per day, either from a bright window or a basic grow light. Established houseplants generally do well with 12 to 14 hours. If you're supplementing with artificial light, a full-spectrum LED grow light is the most energy-efficient option and doesn't have to be expensive. A simple shop light positioned 2 to 4 inches above seedlings works surprisingly well.
For categorizing your light conditions, the practical framework from Cornell Cooperative Extension is useful: high light means bright, direct sun for several hours; medium light means bright indirect light or a few hours of direct sun; low light means no direct sun and limited brightness. Match your plant selection to these categories honestly, and you'll avoid the most common reason plants fail indoors.
Water
Overwatering kills far more plants than underwatering, especially indoors. Root rot, which is caused by consistently soggy soil cutting off oxygen to the roots, is the number one silent killer of houseplants and seedlings. The general rule: water when the top inch or two of soil feels dry to the touch, not on a fixed schedule. How often that happens depends on the plant species, the pot size, the type of soil or medium, the temperature, and the humidity in your space, which is why rigid schedules rarely work. Stick your finger in the soil. If it's still moist, wait.
When you do water, water deeply until it drains from the bottom of the pot, then let the soil dry out appropriately before the next watering. Never let a plant sit in standing water in a saucer for more than an hour. Outdoors, rainfall handles much of this naturally, but during dry spells, check soil moisture 2 to 3 inches down rather than just the surface.
Growing medium
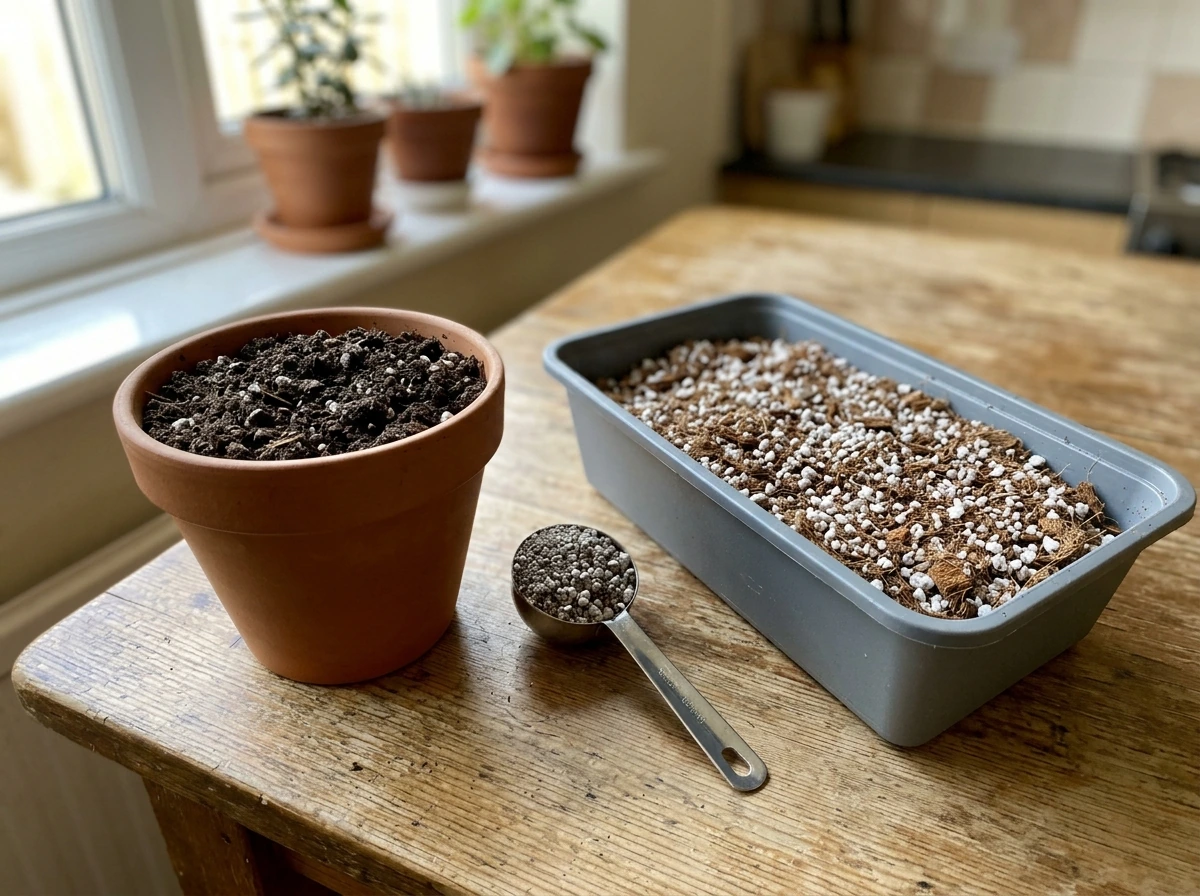
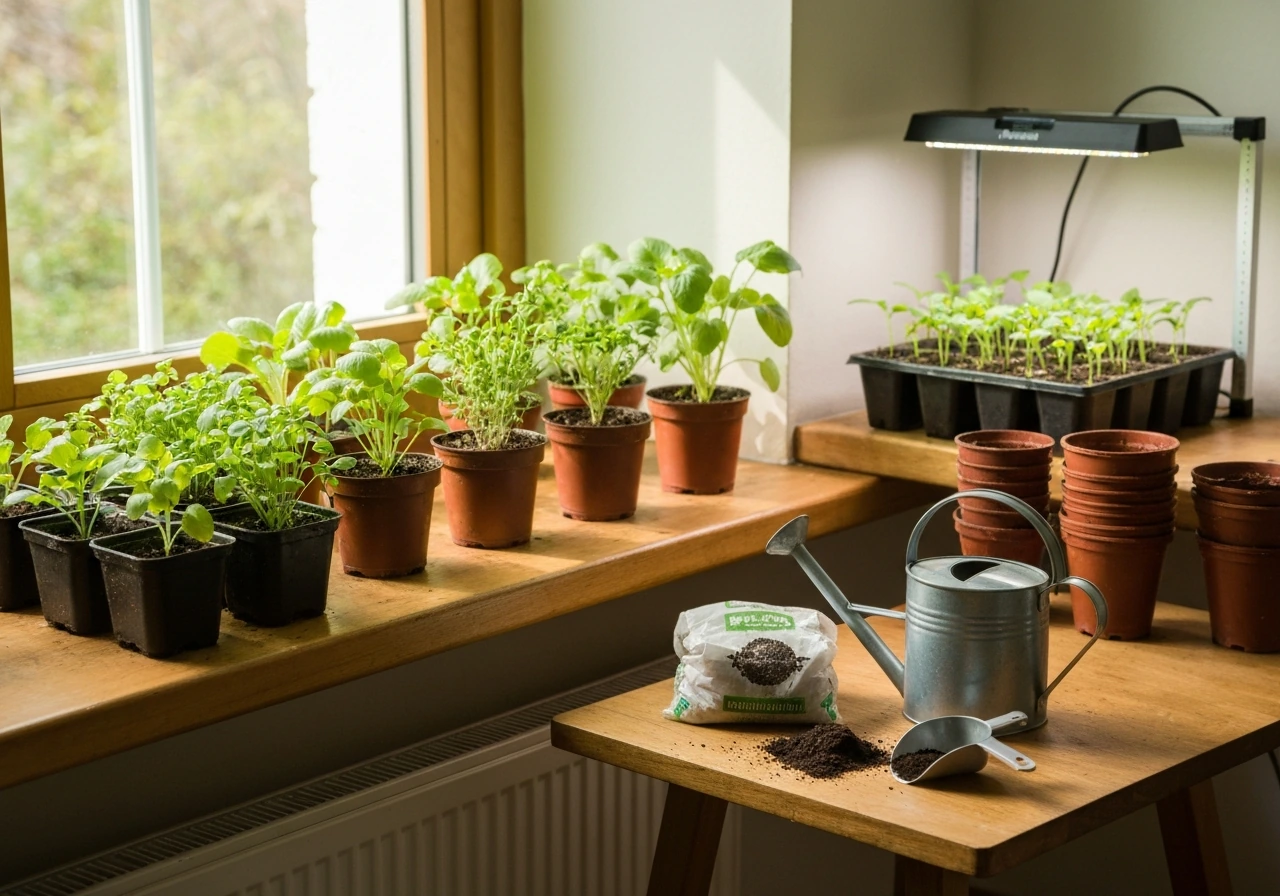
Soil is the default, and a good all-purpose potting mix from any garden center will work for most plants. Avoid using outdoor garden soil in containers because it compacts and doesn't drain well. If you're growing succulents or cacti, mix in perlite or coarse sand to improve drainage. For seed starting, use a fine seed-starting mix rather than regular potting soil, since it's lighter and gives delicate roots an easier path through.
If you want to explore beyond soil, you have real options that the site covers in depth. Water growing (including hydroponics) replaces soil entirely with a nutrient-rich water solution, giving roots direct access to what they need and often producing faster growth. Terrariums use a layered system of drainage material, activated charcoal, and potting mix to create a self-contained microenvironment, great for moisture-loving plants like ferns and mosses. Each medium has its own logic, but all of them still need to provide root support, moisture retention, and access to nutrients.
Nutrients
Plants need three main nutrients: nitrogen (N) for leafy green growth, phosphorus (P) for roots and flowering, and potassium (K) for overall plant health and stress resistance. Most quality potting mixes include enough nutrients to sustain a plant for the first few weeks or months. After that, you need to supplement. A balanced, slow-release granular fertilizer (look for equal N-P-K numbers like 10-10-10) works well for most plants and is the lowest-effort approach. For flowering or fruiting plants, switch to a formula higher in phosphorus once buds form. In hydroponic systems, nutrients are delivered directly through the water solution, so you'll use a liquid hydroponic nutrient mix and monitor levels more actively.
How to choose what to grow
The best plant to grow is one that matches your light, your schedule, and your motivation. Here's an honest breakdown of easy wins and genuine challenges, so you can set yourself up for success rather than frustration. how to grow plants and trees. how do crops grow
Easy wins for beginners
- Pothos: tolerates low light, irregular watering, and almost any indoor condition. Nearly impossible to kill and propagates easily from cuttings.
- Snake plant (Sansevieria): handles drought, low light, and neglect. Perfect for busy people or anyone who travels frequently.
- Basil: grows fast, gives you something useful to harvest, and thrives on a sunny windowsill or under a grow light. Great first food plant.
- Radishes: if you're growing outdoors or in a container, radishes go from seed to harvest in about 25 to 30 days. The fastest payoff in vegetable gardening.
- Lettuce and salad greens: adaptable, can be cut repeatedly (cut-and-come-again), and grow well in shallow containers indoors or out.
- Spider plant: forgiving, air-purifying, produces babies you can propagate, and grows in moderate to bright indirect light.
- Herbs like chives, mint, and parsley: reliable in containers, useful in the kitchen, and tolerant of beginner mistakes.
Plants that are more of a challenge
- Fiddle-leaf fig: extremely sensitive to changes in light, humidity, and watering. Beautiful but unforgiving for beginners.
- Orchids: need specific humidity, indirect light, and careful watering cycles. Better once you have some experience reading plant signals.
- Tomatoes indoors: technically possible but require a lot of light (ideally 14+ hours from a grow light), pollination assistance, and consistent feeding. Better started as an outdoor project.
- Avocado from seed: will grow a sprout, but producing fruit indoors is extremely unlikely. Worth doing as a fun experiment, not a food source.
- Carnivorous plants like Venus flytraps: need distilled or rainwater only, high humidity, and very specific light conditions. A fun specialty project, not a starter plant.
If you've killed plants before and feel discouraged, start with pothos or a snake plant and build your confidence. Once you understand how a plant signals its needs, you'll find it much easier to step up to something more demanding. Plant failures are information, not verdicts. Almost every experienced grower has a graveyard of plants they learned from.
Step-by-step growing process from seed or cutting to harvest
Whether you're starting from seed or a cutting, the lifecycle of a plant follows a predictable arc. Here's how to move through each stage without losing momentum.
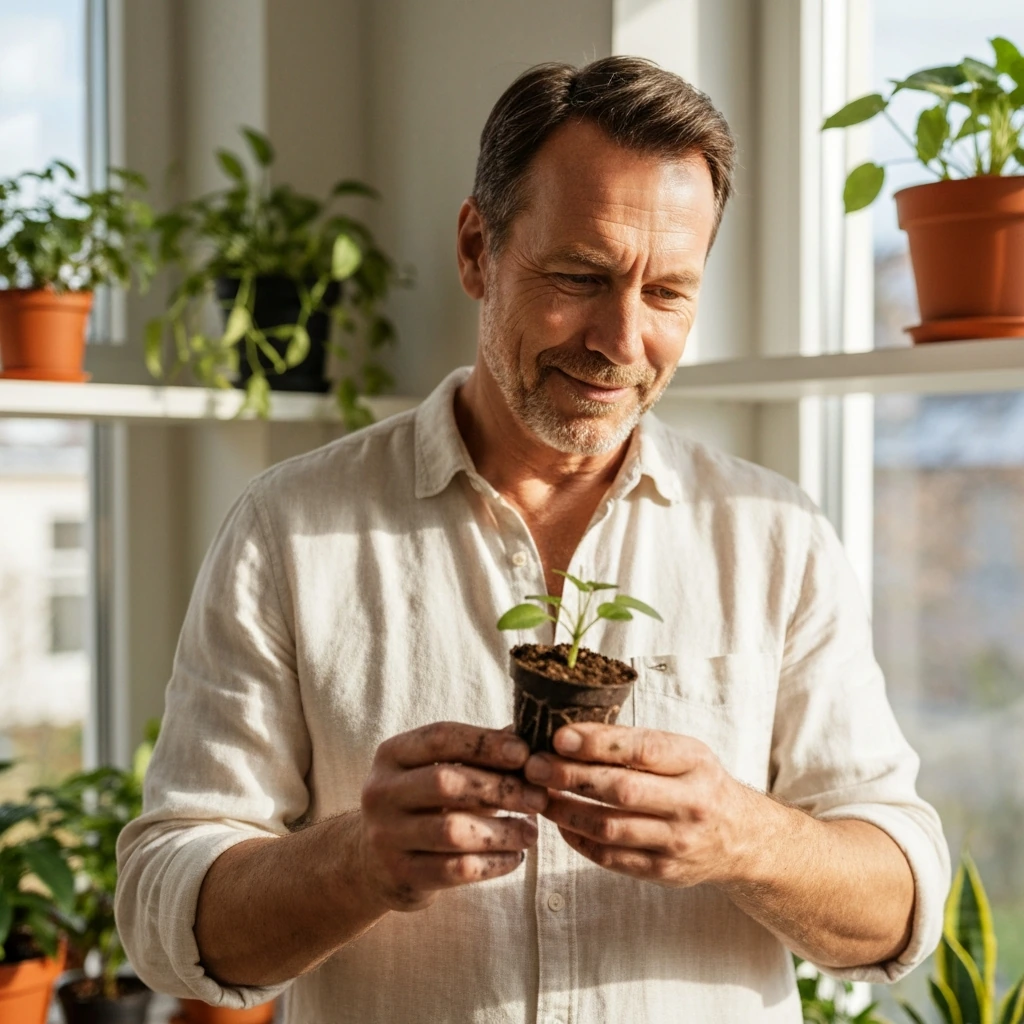
- Choose your start: Seeds give you the most options and the most satisfaction, but cuttings from an existing plant are faster and have a higher success rate for beginners. For a cutting, snip a stem just below a node (the little bump where leaves emerge), remove the lower leaves, and place it in water or moist soil.
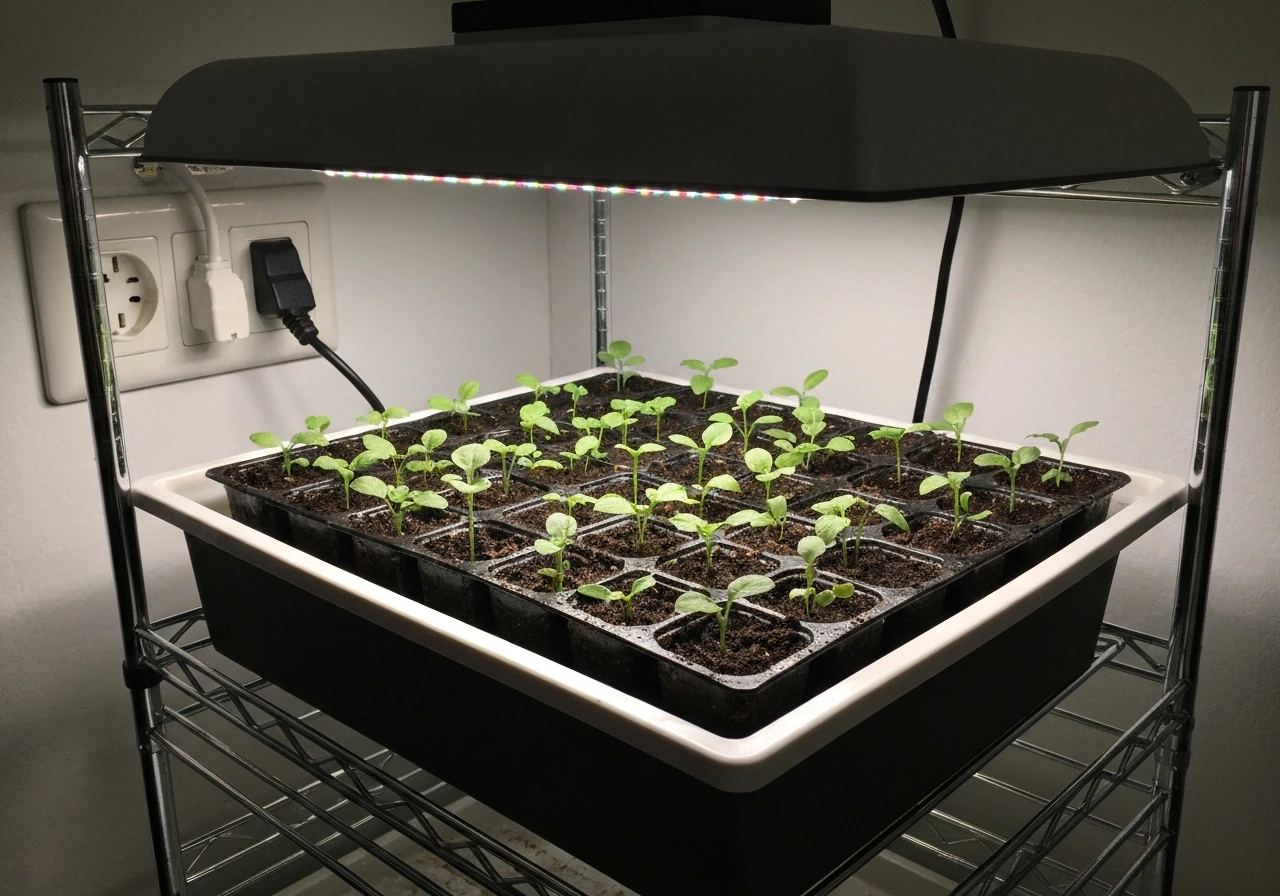
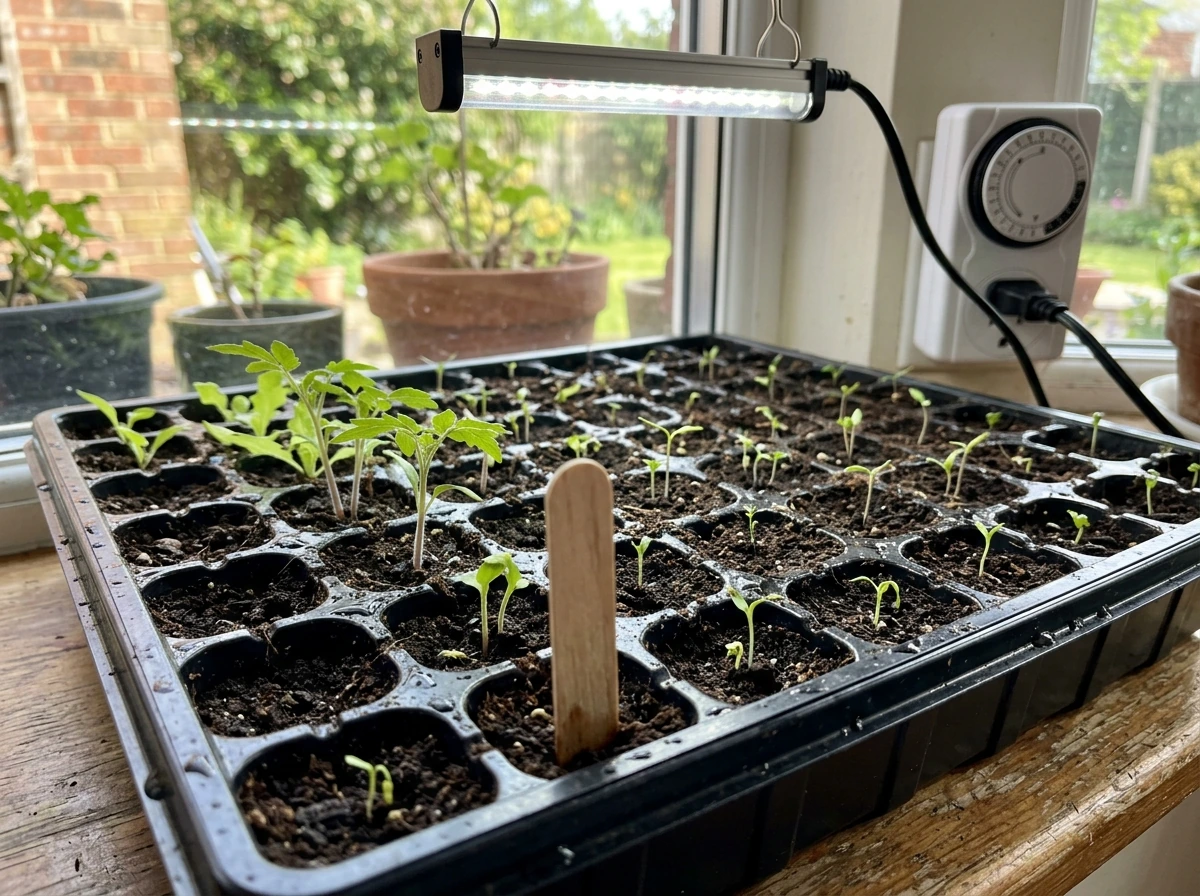
- Germinate seeds correctly: Use a seed-starting mix, not regular potting soil. Sow seeds at the depth recommended on the packet (a general rule is two to three times the seed's diameter). Keep the medium consistently moist, not wet, and provide warmth. Most seeds germinate best between 65°F and 75°F (18°C to 24°C). Cover trays with a clear plastic dome or plastic wrap to hold humidity until sprouts appear.
- Provide light immediately after germination: This is where most beginners lose seedlings. The moment a sprout appears, it needs strong light. A bright south-facing window or a grow light positioned 2 to 4 inches above the tray set to run 16 to 18 hours per day will produce stocky, healthy seedlings. Without enough light, seedlings etiolate, meaning they grow tall and spindly as they stretch toward any available light, and those weak stems rarely recover.
- Thin your seedlings: If multiple seeds germinate in the same cell or pot, thin to the strongest one by snipping the others at soil level. Don't pull them out, since that can disturb the surviving root. It feels wasteful but produces one strong plant instead of several weak ones competing for resources.
- Transplant when roots are ready: For seedlings, wait until they have their second set of true leaves (the leaves that form after the initial seed leaves). For cuttings in water, wait until roots are at least an inch long. Move to a pot one size up from where they started. Going too big too fast means excess soil holds moisture the plant can't use, which increases rot risk.
- Harden off outdoor plants: If you started seeds indoors and are moving them outside, don't go straight from a controlled indoor environment to full outdoor sun. Over 7 to 10 days, set plants outside for increasing periods each day, starting with an hour in a sheltered, shaded spot and working up to full outdoor exposure. Skipping this step causes sunscald and wind damage.
- Maintain through the growth phase: Water consistently using the finger-test method described earlier. Begin feeding with a balanced fertilizer about four to six weeks after germination, or once you've transplanted into fresh potting mix. Monitor for pests weekly by checking undersides of leaves.
- Harvest or maintain at maturity: For edible plants, harvest regularly to encourage continued production. Herbs especially should be pinched back before they flower to keep them producing leaves. For houseplants, this stage is simply about maintaining good conditions and repotting every one to two years as the plant outgrows its container.
Growing in different environments
Where you grow shapes every decision you make. Here's how to approach the most common setups, with specific adjustments for each.
Indoors
Indoor growing is all about controlling what you can and compensating for what you can't. Natural light is usually the limiting factor, so choose your plants based on your actual window situation rather than what you wish your apartment offered. Supplement with a grow light if you want to grow herbs or edibles in a space that doesn't get strong direct sun. Humidity can also be a challenge indoors, especially in winter when heating systems dry out the air. Grouping plants together raises local humidity slightly, and a small humidifier nearby makes a real difference for moisture-loving plants.
Indoors, you're also more susceptible to pest explosions, since there are no natural predators to keep populations in check. Check plants weekly. Catching pests early, when there are just a few insects or a small amount of webbing, is much easier than dealing with a full infestation.
Outdoors and garden beds
Outdoor growing gives plants what they most want: natural light cycles, airflow, and rain. Your job shifts from providing conditions to managing them. Amend your native soil with compost before planting to improve both drainage and nutrient content. Mulching around plants (2 to 3 inches of wood chips or straw) reduces watering needs, suppresses weeds, and regulates soil temperature. If you're working with raised beds or in-ground garden plots, planning around sun exposure and plant spacing (which affects airflow and disease pressure) makes a significant difference. For more detail on garden-specific growing, the guide on how to grow plants in a garden covers this in depth.
Limited space: containers, balconies, and small apartments
Container growing is one of the most flexible approaches available. You can move plants to follow the sun, group them for humidity, and grow in spaces that have no soil at all. The main rules: use a pot with drainage holes, use a quality potting mix (not garden soil), and water more frequently than you would in-ground plants, since containers dry out faster. Self-watering containers are a great option if you travel or tend to forget watering. Vertical growing, stacking planters, and window boxes all help maximize space on a balcony or patio.
Hydroponics and water growing
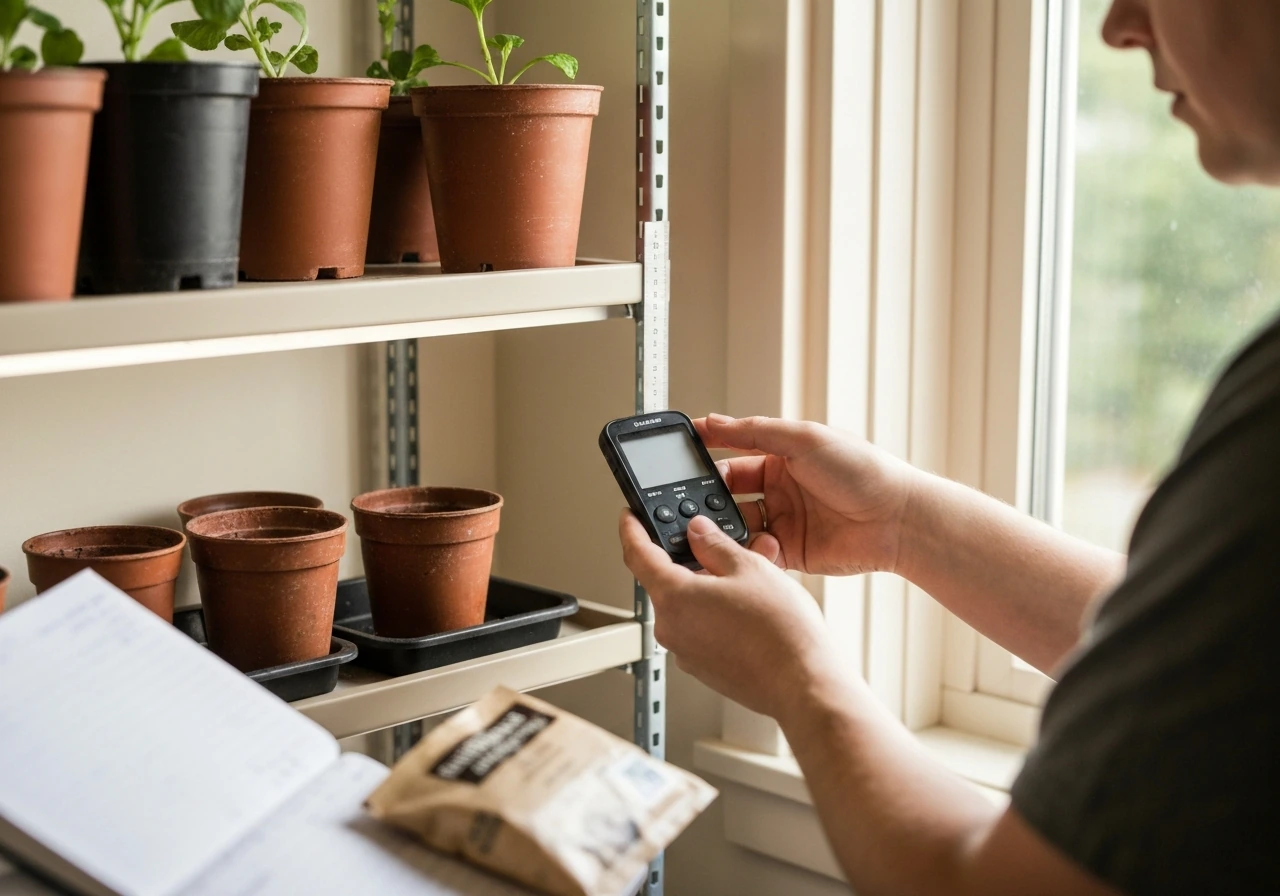
If soil isn't your preference, or you want faster growth and more control, hydroponics is worth exploring. In a hydroponic system, plant roots grow in water (or an inert medium like perlite, clay pebbles, or rockwool) and receive nutrients directly from a liquid solution. This removes the variability of soil and can produce plants that grow 20 to 50 percent faster than their soil-grown counterparts under the right conditions. The trade-off is that you need to monitor water pH (ideally 5.5 to 6.5 for most plants) and nutrient concentration more actively. A simple Kratky method setup, where you grow plants in a container of nutrient solution without a pump, is the easiest entry point and works well for lettuce, herbs, and spinach.
Terrariums
Terrariums are self-contained ecosystems built inside glass containers. Closed terrariums (with a lid) create a humid microclimate that suits tropical plants, ferns, mosses, and selaginella. Open terrariums work for succulents and cacti that need dry air and good drainage. The layered setup matters: start with a drainage layer (gravel or pebbles), then a thin layer of activated charcoal to prevent bacterial buildup, then a suitable potting mix, and finally your plants and decorative elements. Terrariums need very little watering once established, making them a low-maintenance, visually striking option for small spaces.
Growing method comparison
| Method | Best for | Difficulty | Space needed | Watering frequency | Cost to start |
|---|---|---|---|---|---|
| Soil in containers | Beginners, herbs, houseplants, veggies | Easy | Any (windowsill to patio) | Every few days to weekly | Low ($10–$30) |
| Outdoor garden beds | Vegetables, flowers, larger plants | Easy to moderate | Yard or raised bed space | Weekly (rain-dependent) | Low to moderate ($20–$100+) |
| Hydroponics (Kratky) | Lettuce, herbs, leafy greens | Moderate | Countertop or shelf | Top off reservoir every 1–2 weeks | Low to moderate ($20–$60) |
| Hydroponics (active systems) | Faster growth, larger harvests | Moderate to high | Dedicated shelf or grow tent | Automated (check daily) | Moderate to high ($100–$500+) |
| Closed terrarium | Tropical plants, ferns, moss | Easy once built | Small (any glass container) | Rarely (every few weeks to months) | Low ($15–$50) |
| Open terrarium | Succulents, cacti | Easy | Small (any open glass container) | Every 1–2 weeks | Low ($15–$40) |
For most beginners, soil in containers is the best starting point. It's forgiving, familiar, and gives you the widest plant selection. If you want to try something different from day one, a Kratky hydroponic setup for herbs or lettuce is low-cost and surprisingly satisfying. Terrariums are a great choice if you want something low-maintenance and decorative. Move to more complex systems once you understand the fundamentals.
Common problems and what to do about them
Plants communicate through their appearance. Once you learn to read the signals, diagnosing problems becomes much faster. Here are the most common issues you'll encounter and how to address them.
Yellowing leaves
Yellow leaves are the most common complaint and the most ambiguous, because multiple things can cause them. If the yellowing is happening on lower, older leaves and the plant otherwise looks healthy, it's probably just natural leaf aging. If yellowing is widespread, check your watering first: overwatering is the most common culprit and usually comes with soft, mushy stems or soggy soil. If the soil is dry and the plant looks droopy, underwatering may be causing stress. Yellow leaves with green veins (a condition called chlorosis) often point to a nutrient deficiency, usually iron or nitrogen, and respond well to a balanced liquid fertilizer.
Wilting
Wilting that recovers after watering points to underwatering. Wilting in wet soil is a red flag for root rot: the roots are damaged and can no longer transport water, so the plant droops even though moisture is present. If you suspect root rot, unpot the plant, trim any black or mushy roots with clean scissors, let the roots air dry briefly, and repot in fresh, dry potting mix. It's not always a death sentence if you catch it early.
Slow or stunted growth
If a plant isn't growing, the first suspects are light and nutrients. Most houseplants slow down significantly in low light, and many stop growing almost entirely in winter when natural light drops. Check that your plant is getting adequate light for its type, and consider a grow light during darker months. If light seems fine, the plant may be root-bound (roots circling the bottom of the pot with no room to expand), in which case it needs to be stepped up to a larger container. Low nutrient levels are also common in plants that have been in the same potting mix for over a year.
Leggy, stretched growth
Long, stretched stems with wide spacing between leaves (etiolation) is a light problem, plain and simple. The plant is reaching for more light than it's getting. Move it closer to a window, add a grow light, or swap it out for a plant that's actually suited to lower light conditions. You can trim back leggy growth to encourage bushier new growth from below, but it won't help long-term unless the light situation improves.
Pests
The most common houseplant pests are fungus gnats, spider mites, mealybugs, and scale. Fungus gnats are tiny flies hovering around soil, and their larvae damage roots. They thrive in consistently moist topsoil, so letting the top inch dry out between waterings is the most effective control. Spider mites leave fine webbing on undersides of leaves and cause stippled, pale foliage. They hate humidity, so misting or increasing ambient humidity helps, and neem oil spray handles active infestations. Mealybugs look like tiny cotton tufts in leaf joints and are best treated with rubbing alcohol on a cotton swab for small infestations, or insecticidal soap for larger ones. Scale insects look like small brown bumps on stems and are removed similarly.
Brown leaf tips or edges
Brown tips usually point to low humidity, inconsistent watering, or salt buildup from tap water and fertilizer. If your tap water is heavily chlorinated or softened, try letting it sit out overnight before using it, or switch to filtered or rainwater for sensitive plants. If you've been fertilizing regularly, flush the soil every few months by running a lot of plain water through it to wash out accumulated salts. Crispy brown patches in the middle of leaves, rather than at the tips, can indicate sunscald from direct light that's too intense.
The most important thing to remember is that a struggling plant is almost always fixable if you catch it early. Get in the habit of really looking at your plants when you water, not just pouring and walking away. That two-minute check is how you spot problems before they become crises, and it's how experienced growers seem to have an almost magical sense for what their plants need. It's not magic, it's just attention.
FAQ
How do I tell whether I should fix my light or my watering first when a plant looks unhealthy?
Do a quick “touch test” on the roots’ environment first: if the soil is wet, then overwatering or poor drainage is likely, and you should pause watering before adding more light. If the soil is dry and the plant looks droopy, watering is the priority. If the soil moisture is reasonable but growth is slow or stems are stretching, light is usually the limiter. This prevents you from compounding the problem by watering when the roots already lack oxygen.
Do I need to adjust nutrients if my plant is growing slower during winter?
Often, no. In winter, many plants grow more slowly because light drops, so heavy feeding can cause salt buildup even when the plant is not using much. As a rule, reduce fertilizer frequency during low-light months and only resume stronger feeding when you see new growth and consistent light availability.
What potting mix should I use if I want one mix that works for most houseplants?
Use an indoor potting mix that is designed for containers (not straight garden soil) and prioritize good drainage. If you have mixed plant types, add a small amount of perlite to improve aeration and reduce risk of root rot. Avoid “miracle” mixes that hold water for long periods unless you are intentionally growing moisture-loving plants.
How can I prevent overwatering when I travel or forget watering?
Containers fail most often from missed water timing, so plan around it. The simplest option is a pot with good drainage plus a consistent check routine, like feeling the soil when you return home. If you need longer coverage, consider self-watering containers for plants that tolerate more even moisture, or use a humidity tray and group plants to reduce water demand. Still, do not put a thirsty plant in a self-watering system without confirming it likes the moisture level.
Is it okay to use tap water for plants, or should I filter it?
Tap water can be fine for many plants, but if you see repeating brown tips, crust on soil, or leaf discoloration, the source water may be contributing salts or chlorine issues. Letting water sit out overnight can help with chlorine, and switching to filtered or rainwater can help sensitive plants. Also, flush the pot occasionally to reduce salt accumulation.
How do I know when it’s time to repot, and what mistakes should I avoid?
Repot when roots are circling the bottom, roots are drying out unusually fast, or growth stalls despite decent light and nutrients. Avoid jumping multiple pot sizes at once, because extra wet soil raises root-rot risk. Move up gradually, keep the same depth, and use a fresh container mix so drainage stays reliable.
Can I grow edible plants in a low-light apartment?
You can, but success depends on using sufficient light. If your window is truly low-light, herbs and leafy greens typically need supplemental lighting to maintain growth. Focus on shade-tolerant crops for the first attempt, and measure results by leaf production and compact growth, not by “survival.” If plants get tall and leggy, the light is still not enough.
What’s the simplest way to reduce pest outbreaks indoors?
The most effective step is early detection plus consistency. Inspect leaves and undersides weekly, especially near windows and where plants are crowded. Quarantine any new plant for a couple of weeks so you do not introduce pests to the rest of your collection. This matters because pests multiply faster indoors where natural predators are missing.
My plant has yellow leaves, but I’m not sure if it’s nutrients or watering. How should I decide?
Use the pattern. Yellowing on older leaves with overall soft, wet soil points toward watering or root stress. Widespread yellowing plus green veins often suggests a nutrient issue, but verify that soil moisture is not continuously wet first. If you correct watering and the problem does not improve over the next few weeks, then address nutrients with a balanced fertilizer at a moderate rate.
What should I do if I suspect root rot but the plant is already very large?
You can still rescue it, but act fast. Remove the plant from the pot, trim only the black or mushy roots with clean scissors, and let remaining roots dry briefly before repotting into fresh, dry mix. Because large plants hold more moisture in the pot, choose a mix with better drainage and reduce watering temporarily. If the stem base is severely damaged, propagation from healthier portions may be the better path.
How do I avoid fungus gnats if I keep seeing them around seedlings?
The key is moisture control at the surface. Let the top inch of the medium dry between waterings, and avoid keeping seedlings in perpetually damp soil. Sticky traps can reduce adults, but they work best alongside the drying strategy, since larvae thrive in consistently wet topsoil.